
There was this moment a while back when I stumbled upon Shaped Oreo Truffles, and honestly, my foodie heart did a little happy dance. I was at a casual weekend get-together, and these little bites of joy were passed around. They looked like tiny, perfect gems—cute shaped chocolate treats that weren’t just pretty but seriously delicious. That’s when I thought, “I have to bring this magic into my kitchen.” Since then, Shaped Oreo Truffles have become one of those go-to no-bake desserts that never fail to bring smiles around my table.
What I love about making Shaped Oreo Truffles is how they combine fun shapes with that classic Oreo flavor we all adore. They’re like the best of our favorite easy Oreo desserts, but with a little twist that makes them feel special. Plus, they’re totally approachable for any level cook, which means I actually get to enjoy the process, not just the end result. It’s such a simple, no-fuss treat that feels like a secret kitchen win every single time.
If you’ve ever been stuck wondering what sweet to bring to a party or what quick dessert will impress without stress, these Shaped Oreo Truffles are the answer. And honestly, they’re a fun way to play around with classic chocolate truffles, turning them into something really share-worthy. So, friend, trust me when I say, you’re going to want to try making these shaped chocolate treats. Ready to add a bit of fun and flavor to your everyday foodie life? Let’s dive into how to make these gems happen!
What You’ll Need:
This Shaped Oreo Truffles keeps the ingredient list totally approachable—because good food shouldn’t be complicated.
- 36 Oreo cookies (regular, not double stuffed) – You can grab these at any regular grocery store.
- 8 oz cream cheese, softened – Out of cream cheese? No problem, mascarpone works great in this Shaped Oreo Truffles too!
- 12 oz good-quality chocolate (semi-sweet or milk, chopped or chips) – I love using a mix of semi-sweet and milk for a balanced flavor.
- Sprinkles or colored sugars (optional, for decoration)
Budget-wise, this Shaped Oreo Truffles is kind to your wallet because Oreos and cream cheese are pretty affordable staples.
Quick prep tip: Soften your cream cheese ahead of time by leaving it out for 30 minutes or microwaving gently in short bursts.
Leftovers? Store your shaped chocolate treats in an airtight container in the fridge—they’ll keep fresh for about a week, but honestly, they rarely last that long in my house!
Here’s my secret little upgrade that takes this Shaped Oreo Truffles from good to ‘wow’—after shaping, I chill them a bit, then give them a second dip in chocolate for an extra smooth, shiny finish. It’s worth the extra step, trust me!
Let’s Cook This Together:
Start to finish, this Shaped Oreo Truffles comes together in about 45 minutes, and most of that time is hands-off chilling.
- Crush those Oreos! I pop them right into a food processor and pulse until fine crumbs form. No processor? Toss them into a zip-top bag and pound away with a rolling pin. Either way works!
- Mix crumb and cream cheese. Toss your crushed Oreos into a bowl with the softened cream cheese. Stir with a spatula or your hands until everything’s combined and it looks like a dense, moist dough.
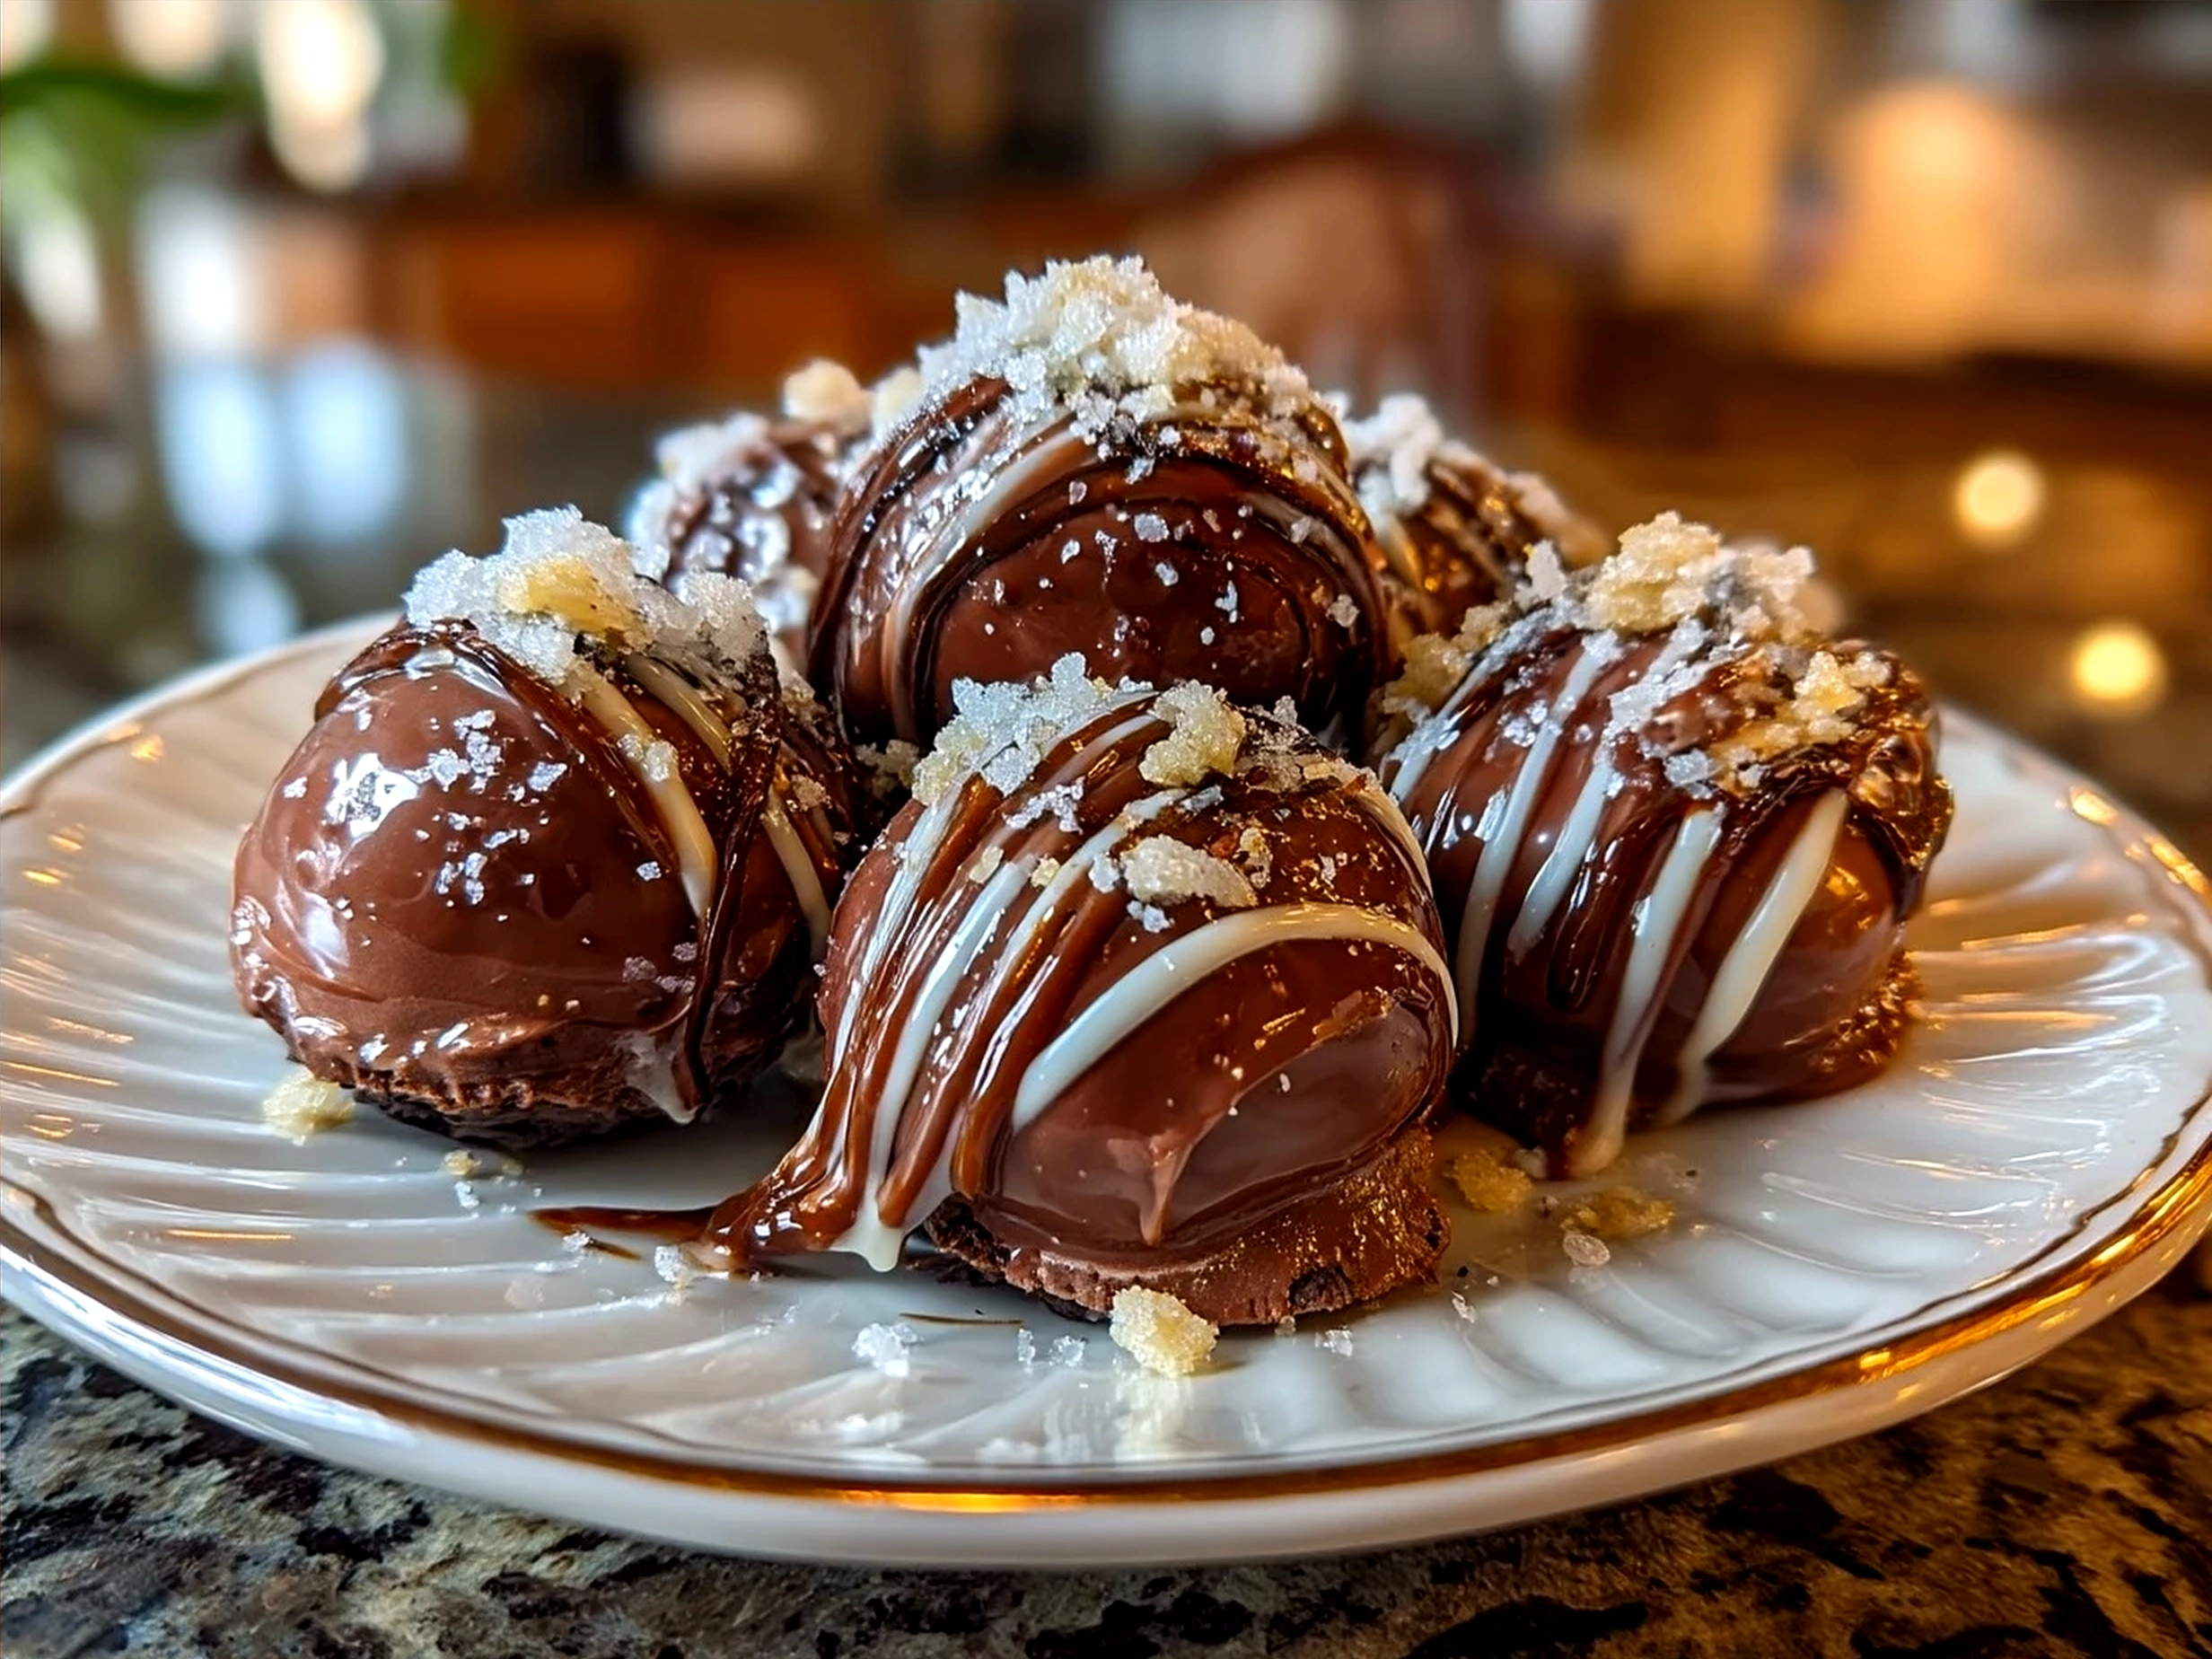
- Shape your truffles. Here’s where the fun starts: roll your mixture into small balls—about 1 inch each. Then, I shape them into little hearts or stars depending on the occasion. This step turns simple Oreo ball recipes into something really special.
- Chill time. Pop your shaped Oreo balls onto a parchment-lined tray and refrigerate for at least 30 minutes. This helps them firm up so they dip easier.
- Melt your chocolate. Use a microwave-safe bowl or a double boiler, melting in short bursts and stirring frequently until silky smooth.
- Dip and decorate. Use a fork or toothpick to dip your shaped Oreo truffles into the melted chocolate. Let the excess drip off, then set back on parchment. Sprinkle quickly with your decorations if you want.
- Final chill. Let your truffles firm in the fridge for about 15 minutes before digging in.
Quick kitchen nugget: if your shaped Oreo truffles looks like the chocolate is too thick or clumpy, gently warm it again, stirring well to smooth things out.
While your Shaped Oreo Truffles are chilling, it’s a great time to pour yourself a cup of coffee or set the table—and get ready for some serious yum.
How to Serve & Savor It:
This Shaped Oreo Truffles truly shines when you serve it with a cold glass of milk or a cup of hot coffee. The creamy, crunchy, and chocolatey combo is a classic win every time.
I’ve found that these shaped chocolate treats are absolute showstoppers during holiday parties, baby showers, or as little sweet bites after a casual dinner with friends. And they’re so simple to make ahead, which scores major points with busy foodies.
For a quick presentation upgrade, arrange your Shaped Oreo Truffles on a pretty plate or tiered stand, maybe with some fresh berries or edible flowers for color contrast. It feels super fancy without buying a thing!
Leftovers? Sometimes, I crumble a truffle over ice cream or blend a couple into a milkshake for an instant treat makeover.
One seasonal twist I adore is pairing these Shaped Oreo Truffles with peppermint sprinkles around the holidays—instant festive vibes.
Friends always ask me for the recipe after tasting these, which definitely makes this easy Oreo desserts a crowd-pleaser in my book.
Your Questions, Answered:
Here’s what I get asked most about Shaped Oreo Truffles—let’s chat like we’re just hanging out in the kitchen.
Can I prep parts of this Shaped Oreo Truffles ahead?
Absolutely! You can crush Oreos and mix the dough a day ahead, then shape and dip the next day. It actually makes the truffles easier to handle.What’s a good swap for cream cheese in this Shaped Oreo Truffles?
Mascarpone or even softened butter can work if you’re out of cream cheese—just expect a slightly different texture.How can I make this Shaped Oreo Truffles for more or fewer people?
This recipe scales up or down really well. Just keep the ratio of Oreos to cream cheese consistent.Can I freeze these shaped chocolate treats?
Yep! Freeze before dipping, then store frozen in a sealed container. When you’re ready, dip and chill like usual.What if my chocolate hardens dull or streaky?
It probably needs tempering. Or you can just remelt and dip again—no worries.Any fun variations?
Try white chocolate coating or a sprinkle of sea salt on top. For Valentine’s, check out this No-Bake Oreo Heart Truffles.Are these Shaped Oreo Truffles good for special diets?
They’re vegetarian-friendly but do contain dairy and gluten from Oreos as is. For dairy-free or vegan options, swap cream cheese and chocolate with plant-based versions and look for gluten-free Oreos.
For more everyday foodie inspiration, check out my other easy Oreo desserts like No-Bake Oreo Cheesecake Bites or the classic No-Bake Oreo Cheesecake. If you like these shaped truffles, you might also enjoy this 4-ingredient Oreo Balls recipe from Sally’s Baking Addiction.
Final Foodie Thoughts:
Shaped Oreo Truffles hold a special spot in my foodie heart because they mix playful presentation with that unbeatable Oreo flavor we can’t resist. They’ve been my reliable dessert superstar, especially when hosting friends who love something sweet-but-simple.
My Top Shaped Oreo Truffles Tips:
- Chill your truffle dough well before shaping to make it easier to handle.
- Use good-quality chocolate for dipping for that silky finish.
- Don’t rush the chilling steps—it really helps the texture and look.
Some of my favorite Shaped Oreo Truffles variations include white chocolate coating with pink sprinkles, a dash of espresso powder in the dough for a mocha twist, and peppermint addition for festive cheer. The classic semi-sweet dipped truffle is by far the most requested version—everyone loves its familiar yet elevated vibe.
I encourage you to put your own spin on this easy Oreo dessert. Change the shapes, try different decorations, or remix the base in fun ways. What I hope you love most is how these shaped chocolate treats bring that “made it myself” glow and joy.
Grab some Oreos, your cream cheese, and chocolate, and let’s make those Shaped Oreo Truffles soon! Your kitchen and taste buds are in for a real treat.
For some extra inspiration, you can peek at this tasty three-ingredient white chocolate Oreo truffles idea from the Facebook group White chocolate Oreo truffles 3 ingredients. It’s a fab quick fix when you’re short on time but still want that gorgeous no-bake dessert vibe.

Shaped Oreo Truffles

Deliciously creamy Oreo truffles shaped into fun forms, perfect for parties or sweet treats that combine rich chocolate and classic cookies in every bite.
- Prep Time: 20 minutes
- Cook Time: 0 minutes
- Total Time: 90 minutes
- Yield: 24 truffles
- Category: Dessert
- Method: No-Cook
- Cuisine: American
Ingredients
- 36 Oreo cookies, crushed
- 8 oz cream cheese, softened
- 12 oz white chocolate, melted
- Food coloring (optional)
- Sprinkles or edible decorations (optional)
Instructions
- Crush the Oreo cookies into fine crumbs using a food processor or by placing them in a sealed bag and pounding with a rolling pin.
- In a mixing bowl, combine the crushed Oreos and softened cream cheese until a smooth dough forms.
- Shape the mixture into desired shapes like balls, hearts, or stars using your hands or molds.
- Place the shaped truffles onto a baking sheet lined with parchment paper and refrigerate for at least 1 hour to firm up.
- Melt the white chocolate in a microwave-safe bowl in 30-second intervals, stirring until smooth.
- If desired, tint the melted white chocolate with food coloring for colorful coatings.
- Dip each chilled truffle into the melted chocolate, ensuring it’s fully coated. Use a fork to lift and let excess chocolate drip off.
- Place dipped truffles back onto parchment paper and decorate with sprinkles or edible decorations while the coating is still wet.
- Refrigerate the coated truffles until the chocolate hardens, about 30 minutes.
- Serve chilled or at room temperature and enjoy your shaped Oreo truffles!
Notes
For extra texture, try rolling the truffles in crushed nuts or cocoa powder before dipping in chocolate.