
You know that feeling when you walk into the kitchen and the smell of something warm and homey instantly wraps around you like a cozy hug? That’s straight from freshly baked Homemade Bread, and honestly, it’s my ultimate comfort food moment. I first fell head over heels for making Homemade Bread years ago during a lazy Sunday when I was tired of the usual store-bought stuff. There’s just something magical about mixing simple ingredients—flour, water, yeast—and seeing that yeast dough come to life, rising and bubbling, until it transforms into this golden artisan loaf that tastes like a million bucks.
Homemade Bread fits into my foodie life like a reliable sidekick that’s always ready to make any meal feel special. Whether it’s breakfast smeared with butter that melts right in or a sandwich base that holds up to all the juicy fillings, this Homemade Bread is pure joy. It’s not complicated or fancy. It simply delivers all the satisfying, fresh-from-the-oven goodness that’s too often missing from store shelves.
And here’s the best part—making this Homemade Bread is an open invitation to slow down and enjoy the process. Sure, it takes time for that bread rising to work its magic, but it’s the kind of rewarding wait that fills your kitchen with anticipation and your heart with pride. Plus, sharing that fresh bread with friends or family? Nothing beats the smiles and the “Wow, you made this?” moments. I’m genuinely excited to pass along this recipe to you, because I know once you try it, Homemade Bread won’t just be a recipe—it’ll be one of those kitchen wins that sticks around. Ready to bake together? Let’s get your oven buzzing with the wonderful smell of Homemade Bread!
What You’ll Need:
This Homemade Bread keeps the ingredient list totally approachable—because good food shouldn’t be complicated.
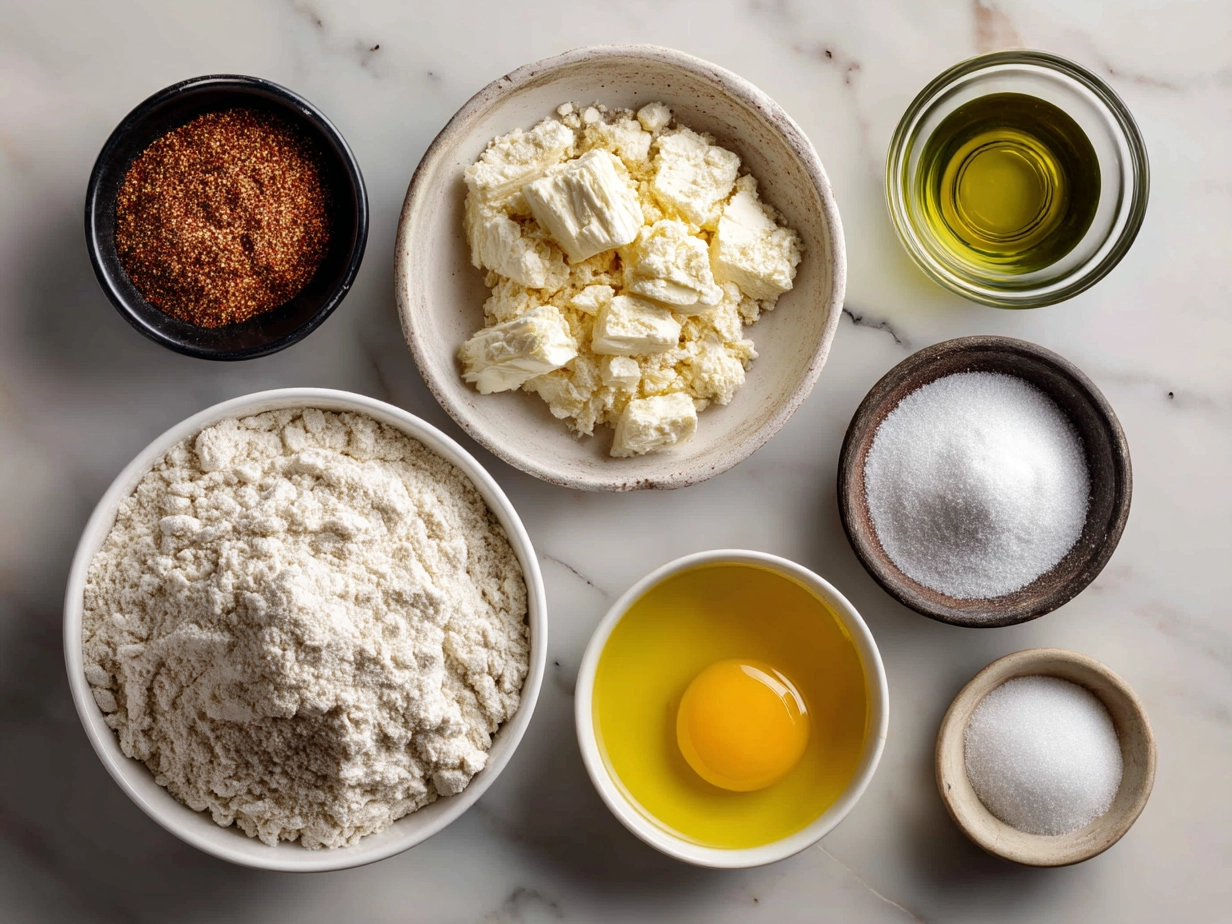
- 3 ½ cups (420g) all-purpose flour – You can grab this at any regular grocery store. Out of all-purpose? Bread flour also works great and gives a bit more chew.
- 1 packet (2 ¼ teaspoons) active dry yeast – If you only have instant yeast, no worries, just use the same amount.
- 1 ½ cups warm water (around 110°F/43°C) – Finger warm, not hot, to wake up that yeast without killing it.
- 1 tablespoon sugar or honey – Adds a little sweet kiss to help with bread rising.
- 2 teaspoons salt – Don’t skip this; salt keeps the flavor balanced.
- 2 tablespoons olive oil or neutral oil – Optional but adds a subtle richness and keeps your crust tender.
Budget note: This Homemade Bread is kind to your wallet because you’re working with pantry staples mostly.
Quick prep tip: Measure your flour loosely with a spoon and level it off for the best results. If you squeeze it in, your loaf can get dense.
Storage ideas: Leftover Homemade Bread stashes well wrapped in a kitchen towel or stored in a bread box for 2-3 days. Freeze slices individually in a ziplock and toast straight from the freezer for fresh taste any day.
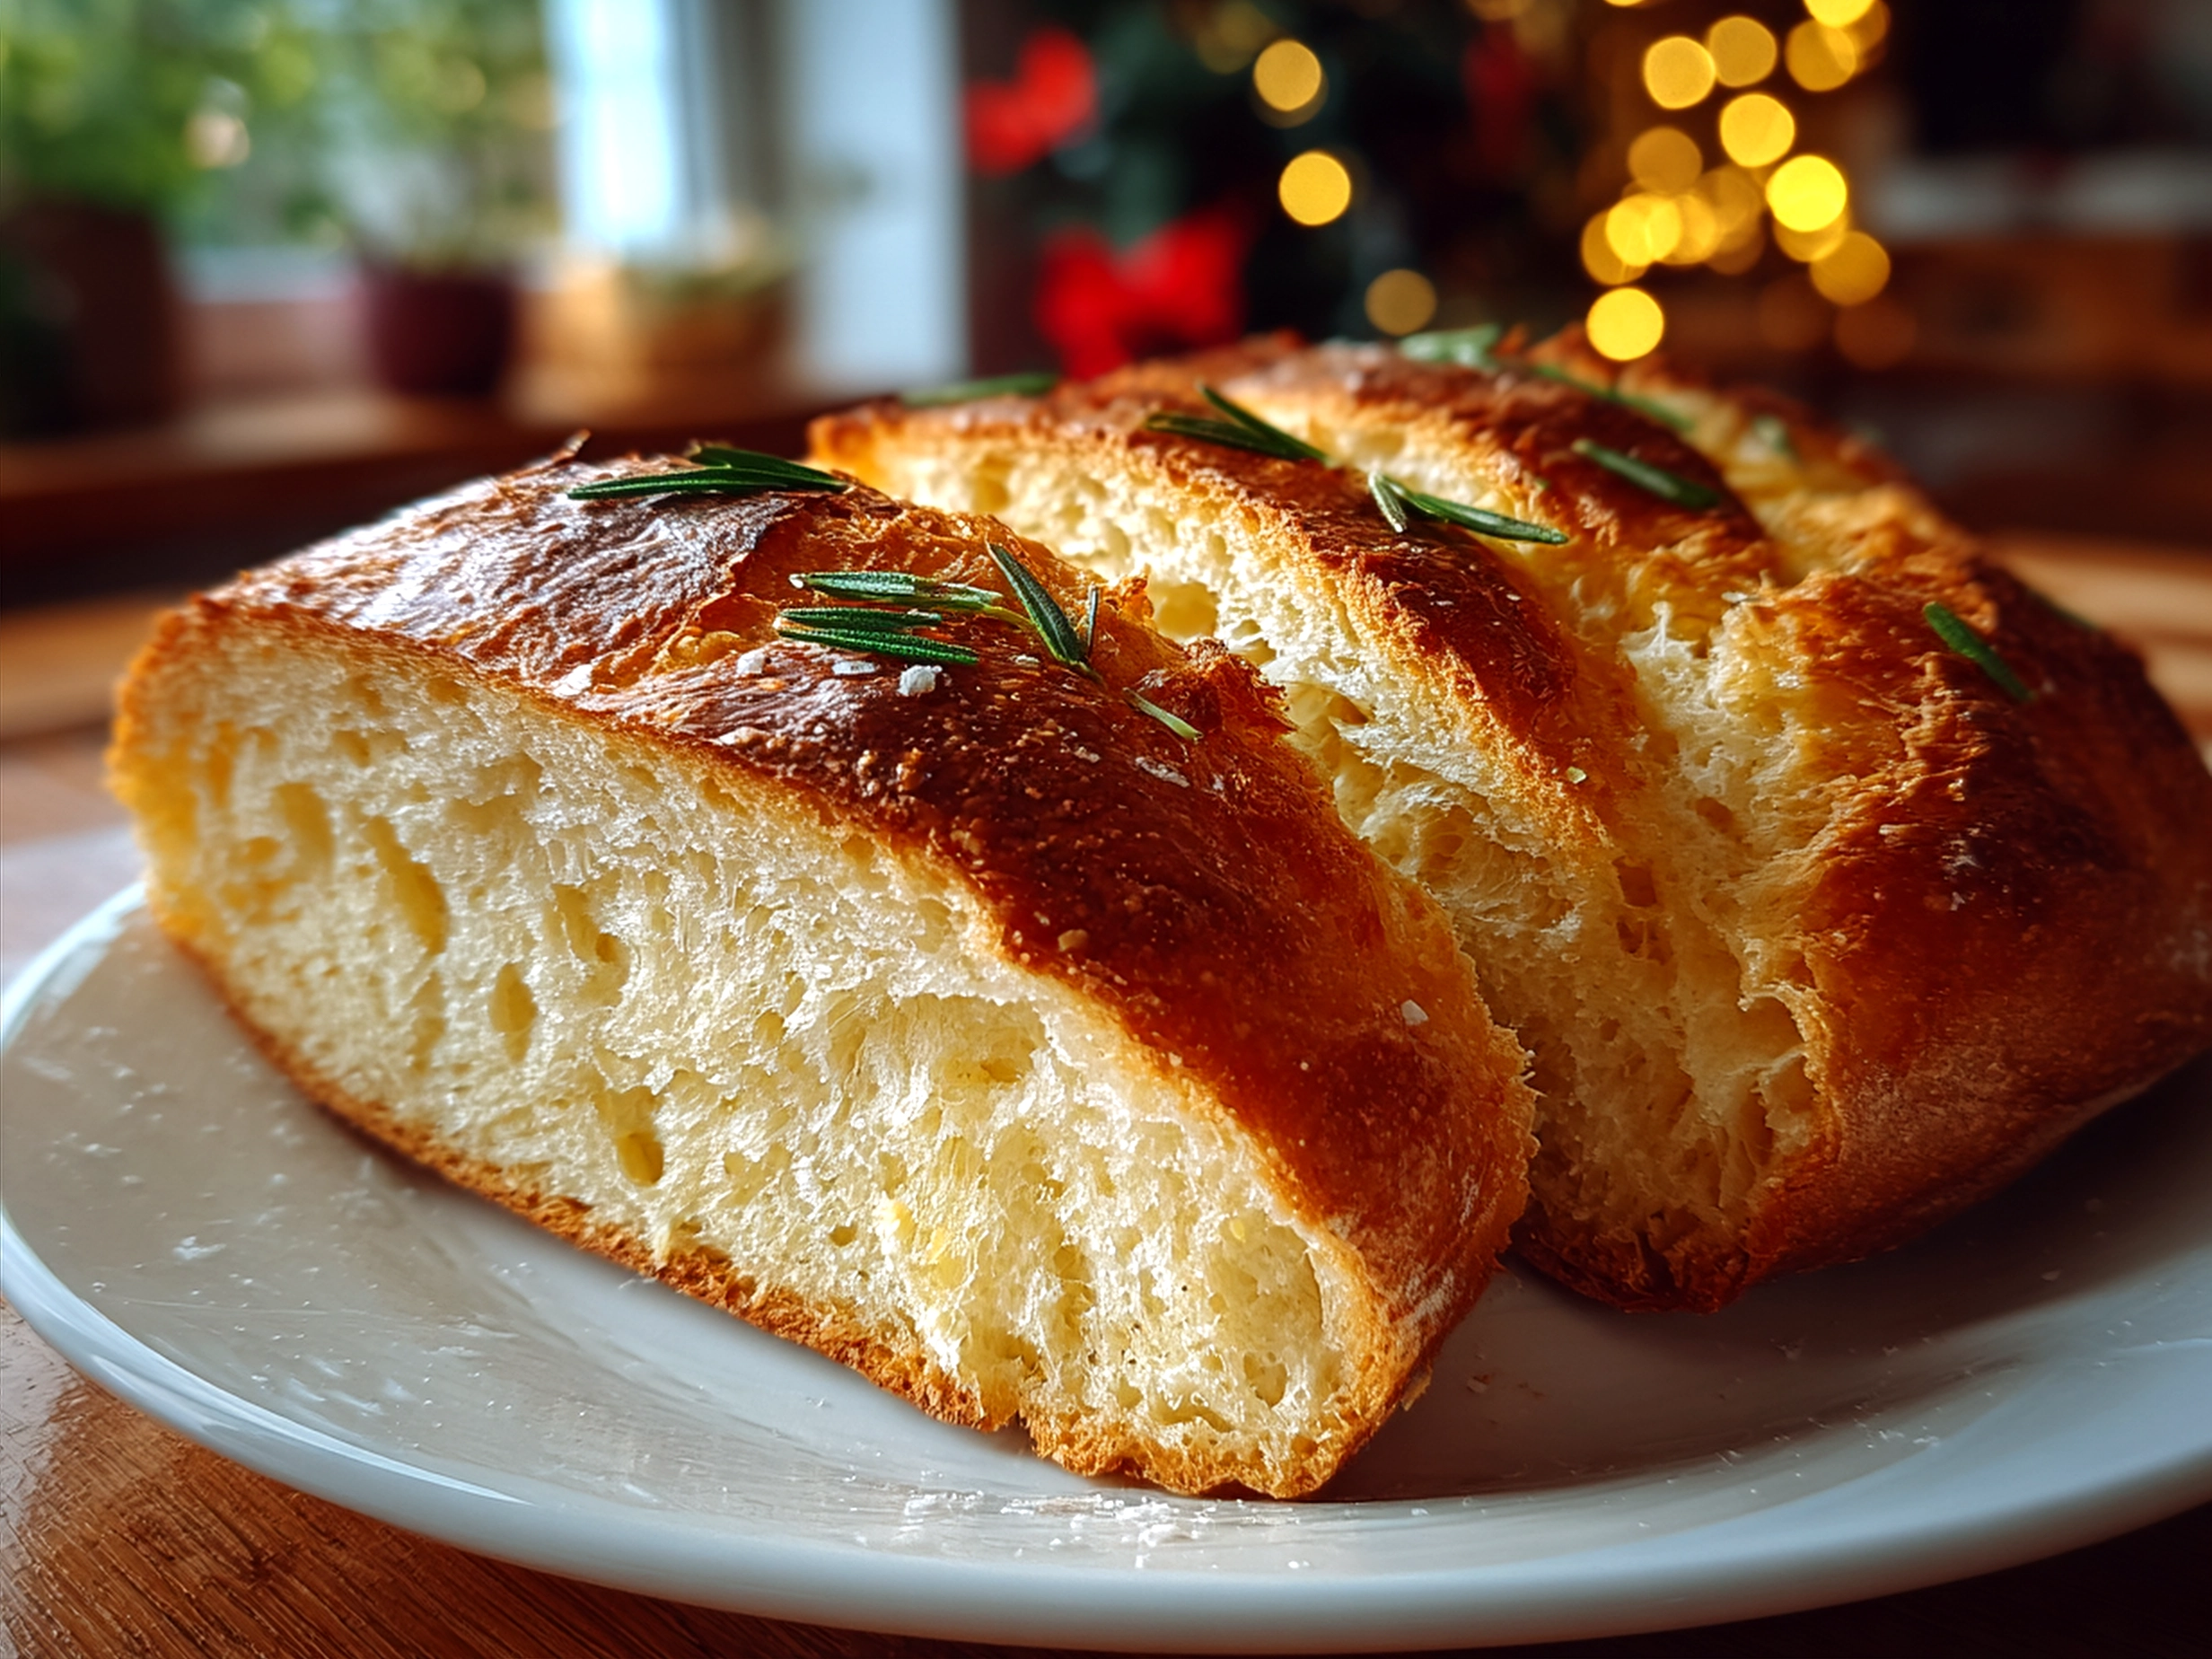
Here’s my secret little upgrade that takes this Homemade Bread from good to “wow”—I always add a sprinkle of dried herbs like rosemary or thyme right into the dough for that extra flavor burst. It’s simple but feels special.
Let’s Cook This Together:
Baking Homemade Bread side-by-side is easier than you think! Start to finish, this Homemade Bread comes together in about 3 to 4 hours, but most of that time’s waiting for that beautiful bread rising.
- Wake Up the Yeast: In a large mixing bowl, dissolve the sugar or honey into your warm water. Sprinkle the active dry yeast over the top and let it sit for about 5 to 10 minutes until frothy and bubbly. That’s your yeast dough saying, “I’m alive!”
- Mix the Dough: Add your flour, salt, and olive oil to the yeast mix. Stir everything together with a wooden spoon until it begins to form a shaggy dough. It’s okay if it feels a bit sticky—that’s perfect!
- Knead Time: Lightly flour your workspace and knead the dough for about 8 to 10 minutes. This builds the gluten structure you want for a great artisan loaf. If your dough sticks to your hands, sprinkle a tiny bit more flour but keep it on the softer side.
Pro tip: If kneading isn’t your jam, you can try a no-knead bread method similar to the one found in this Amazing Artisan Bread for 40 Cents a Loaf – No Kneading, No … or check out Easy Whole Wheat Artisan Bread Recipe – The Conscientious Eater for a hands-off approach. - First Rise: Shape your dough into a ball and place it in a lightly oiled bowl. Cover with a clean kitchen towel and let it rest in a warm spot for about 1 to 1.5 hours until doubled in size. This bread rising stage might seem slow, but that’s where the magic happens. Your kitchen will start smelling incredible!
- Shape Your Loaf: Once risen, punch down the dough gently and transfer it to a floured surface. Shape it into a rustic round or oval artisan loaf and place it on a baking sheet lined with parchment paper.
- Second Rise: Cover again with a towel and let your dough rise for another 30 to 45 minutes. This little rest gives the final lift before baking.
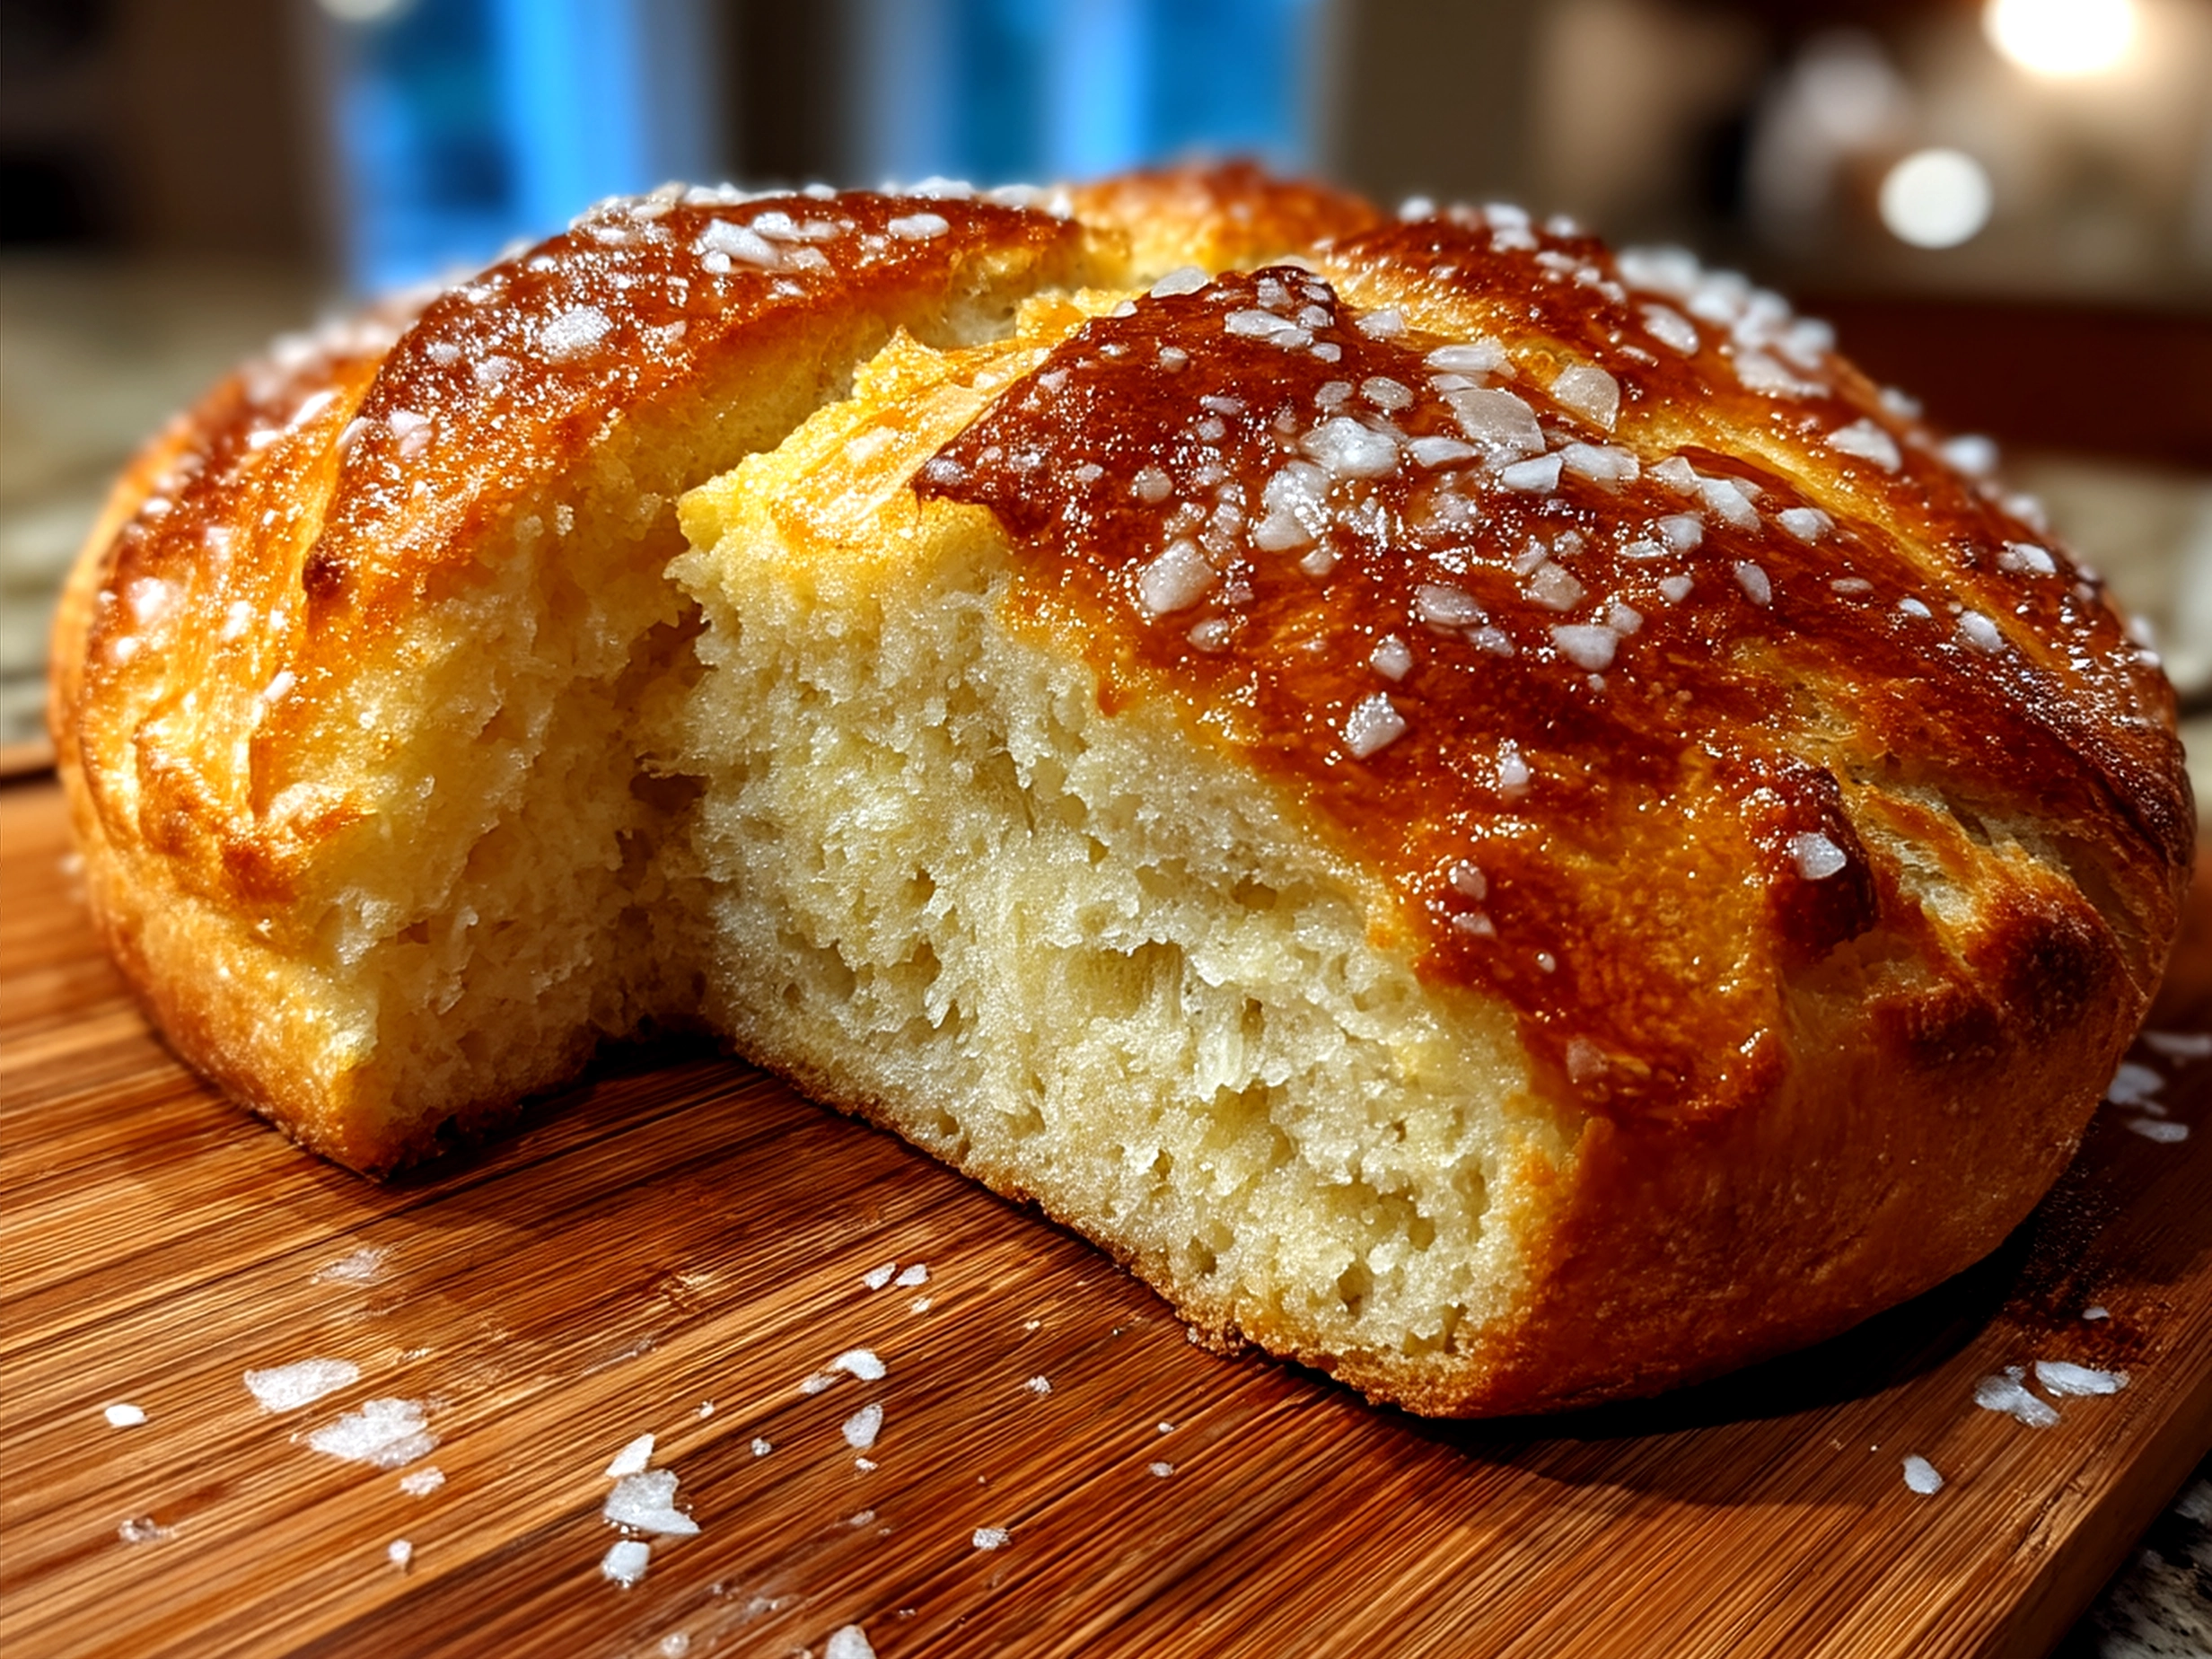
- Bake Time: Preheat your oven to 425°F (220°C). For a great crust, pop a small oven-safe dish of water on the bottom rack to create steam. Bake the bread for 25 to 30 minutes until it’s golden brown and sounds hollow when tapped. Don’t worry if your Homemade Bread looks a little rustic—that’s part of the charm!
Shortcut nugget: I’ve made this recipe following the timeless advice from this artisan bread master recipe, which helped me skip complicated steps but keep every bit of flavor and texture.
While your bread is baking, pour yourself something refreshing to drink. You deserve it! Trust me, once you slice into warm, soft crumb with that crispy crust, you’ll want to make this Homemade Bread again and again.
How to Serve & Savor It:
This Homemade Bread truly shines when you serve it warm, slathered with butter that melts instantly. My absolute favorite way to enjoy this Homemade Bread is on a lazy weekend morning with a lazy brunch feast. Pair it with some of my favorite savory hits like a spicy Portuguese chili chicken from here or even a creamy cranberry jalapeno dip to spread over the slices for a little kick (you can find that tasty idea here).
For dinners, this Homemade Bread is a perfect partner to soups and stews—the kind that you want to dunk right in. Think warming bowls on chilly nights, where the bread’s crisp crust balances every spoonful of comfort inside the bowl.
Presenting your Homemade Bread couldn’t be simpler: slice it thick or thin, pile on obvious toppings, or keep it simple with a drizzle of olive oil and a sprinkle of flaky salt. If you’ve got leftovers—and trust me, that won’t last long—turn them into croutons or breadcrumbs for salads or grounding crispy toppings.
One fun seasonal twist I’ve tried is adding fresh herbs to the dough during spring, bringing a garden freshness to the loaf that makes it feel tied to the season. It’s become a crowd-pleaser every time friends come for a bite!
Your Questions, Answered:
- Can I prep parts of this Homemade Bread ahead?
Absolutely! You can mix your dough the night before and let it proof overnight in the fridge. That slow bread rising creates even more flavor. Just bring it to room temp before shaping and baking. - What’s a good swap for all-purpose flour in this Homemade Bread?
Bread flour definitely works and gives a chewier texture. Whole wheat flour can replace up to half if you want nuttier flavor but expect a denser loaf. - How can I scale this Homemade Bread for more or fewer people?
This recipe is super flexible. Just halve or double the ingredients to suit your needs. The timing for bread rising might change slightly—keep an eye on that dough instead of the clock. - Is homemade yeast dough tricky for beginners?
It’s easier than it looks! If you can stir, knead a bit, and be patient with bread rising, you’ve got this covered. For a no-knead shortcut, check out this simple recipe to start. - My Homemade Bread crust is too hard, what can I do?
Try reducing oven temperature by 25°F and baking a few extra minutes. Adding a splash of olive oil to dough softens the crust slightly too. Also, wrapping the loaf in a kitchen towel after cooling keeps it tender. - Can I add extras like seeds or nuts?
Yes! Toss seeds, nuts, or herbs right in when you’re mixing your flour and yeast dough. This makes lovely artisan loaves that impress on first bite. - What’s the best way to store leftover Homemade Bread?
Keep leftovers wrapped in a tea towel or paper bag at room temperature for a couple of days, then freeze any extras in slices. Toast from frozen for just-out-of-the-oven taste!
Final Foodie Thoughts:
This Homemade Bread holds a special spot in my foodie heart because it’s more than just food—it’s a little moment of joy I make with my own hands. Every loaf feels like a success story that fills my kitchen with those incredible smells and invites family and friends to gather round. It’s not fancy, but it’s real and delicious every single time.
My Top Homemade Bread Tips:
- Always use warm water to bloom your yeast; it’s key for that perfect bread rising.
- Don’t rush the proofing—letting your dough double in size is the step that takes your loaf from “meh” to spectacular.
- Try adding herbs or seeds during the mix for a personalized artisan loaf that shows off your style.
As for variations, I’ve loved switching up my Homemade Bread with whole wheat flour for nuttiness, stirring in sun-dried tomatoes and basil for a Mediterranean vibe, or dropping in olives and rosemary for something savory and special. The sun-dried tomato artisan loaf gets requested the most at my table—it’s a total crowd-pleaser.
I hope you find as much happiness in baking and sharing this Homemade Bread as I do. Make it yours—tweak it, flavor it, share it—and savor those blissful moments of fresh, warm bread at home. You’re about to discover a new favorite that’s always there to lift your everyday meals. Can’t wait to hear how yours turns out!
For more everyday foodie inspiration, check out my favorite crowd-pleasers like Spicy Portuguese Chilli Chicken, Cranberry Jalapeno Dip, or treat yourself with these Apple Cider Donuts for a sweet snack alongside your Homemade Bread. Happy baking, friends!
Homemade Bread
This homemade bread is soft, fluffy, and easy to prepare, perfect for sandwiches or as a side to any meal. Enjoy the warm aroma and fresh taste of freshly baked bread.
- Prep Time: 15 minutes
- Cook Time: 35 minutes
- Total Time: 1 hour 50 minutes
- Yield: 12 servings
- Category: Dinner
- Method: Baked
- Cuisine: American
Ingredients
- 4 cups all-purpose flour
- 1 packet (2 1/4 tsp) active dry yeast
- 1 1/2 cups warm water (110°F/45°C)
- 2 tbsp sugar
- 2 tbsp olive oil
- 1 1/2 tsp salt
Instructions
- In a large bowl, dissolve the sugar in warm water and sprinkle yeast on top. Let it sit for 5-10 minutes until foamy.
- Add olive oil, salt, and 2 cups of flour to the yeast mixture. Stir until combined.
- Gradually add the remaining flour, 1/2 cup at a time, mixing well each time until the dough pulls away from the sides.
- Turn the dough onto a floured surface and knead for about 8-10 minutes until smooth and elastic.
- Place the dough in a greased bowl, cover with a damp cloth, and let rise in a warm place for 1 hour or until doubled in size.
- Punch down the dough and shape into a loaf. Place in a greased loaf pan.
- Cover and let rise for another 30-45 minutes until it doubles again.
- Preheat oven to 375°F (190°C). Bake the bread for 30-35 minutes or until golden brown and sounds hollow when tapped.
- Remove from oven and let cool on a wire rack before slicing.
Notes
For a crustier loaf, place a pan of water in the oven while baking to create steam.