
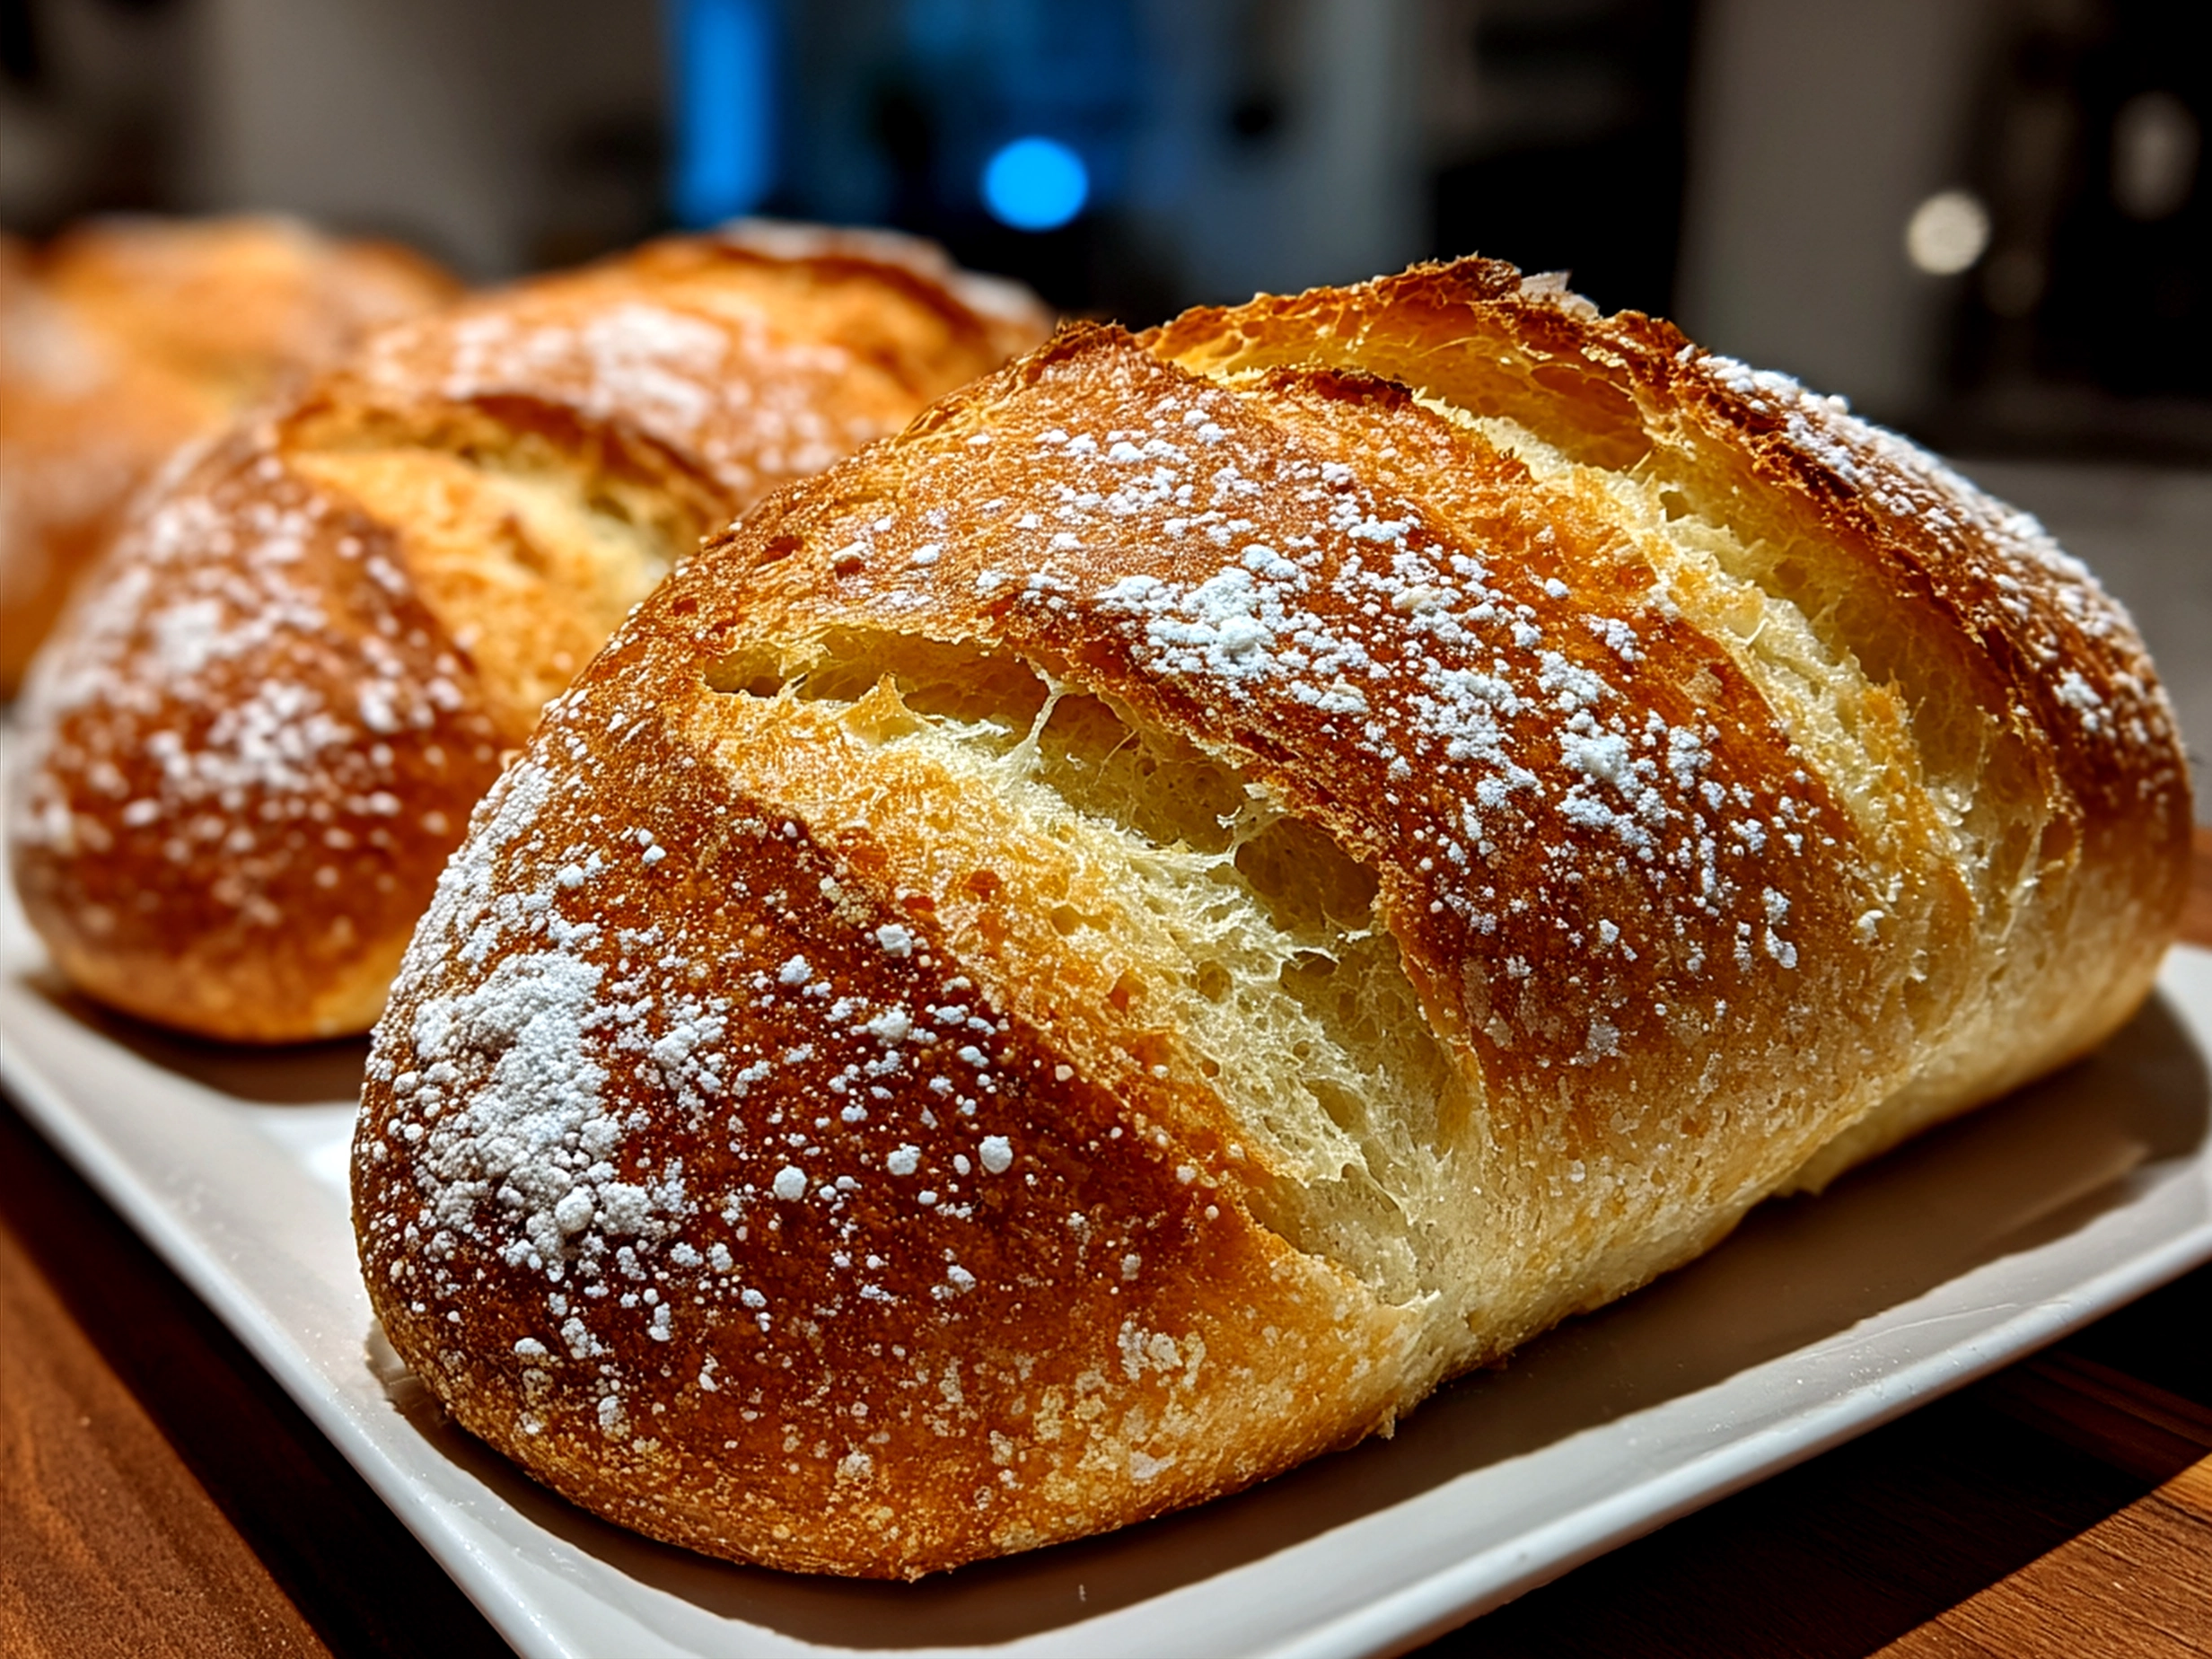
I still remember the day I first nailed this Homemade Italian Bread like it was yesterday. The kitchen smelled like a cozy Italian bakery, and that golden crust had me smiling before I even tried a bite. This wasn’t just any bread; it was the kind that makes you want to pause and savor every crumb. Homemade Italian Bread has become a total game-changer in my foodie life because it’s simple, satisfying, and wildly addictive. If you’re craving that perfect crusty exterior and soft crumb, trust me, this bread is for you.
Sometimes, I get that “what’s for dinner?” blank stare, and Homemade Italian Bread is my delicious answer every single time. It fills the house with such a warm aroma that everyone gathers in the kitchen before I even mention food. Plus, making your own bread feels like a tiny win in a busy world—every step is an opportunity to slow down and celebrate good food. I’m on a mission to share this joy with you, friend! So grab your apron, and let’s make some Homemade Italian Bread that’s going to steal the show at your table.
This bread feels like a hug from the inside—versatile, comforting, and impossibly tasty. I can’t wait for you to try this Italian bread recipe and experience the satisfaction that comes from homemade bread baking. Friends who’ve tasted this traditional Italian loaf can’t get enough, and I bet you’ll feel the same way. Let’s make bread that’s soulful and simple. Ready? Let’s do this!
What You’ll Need:
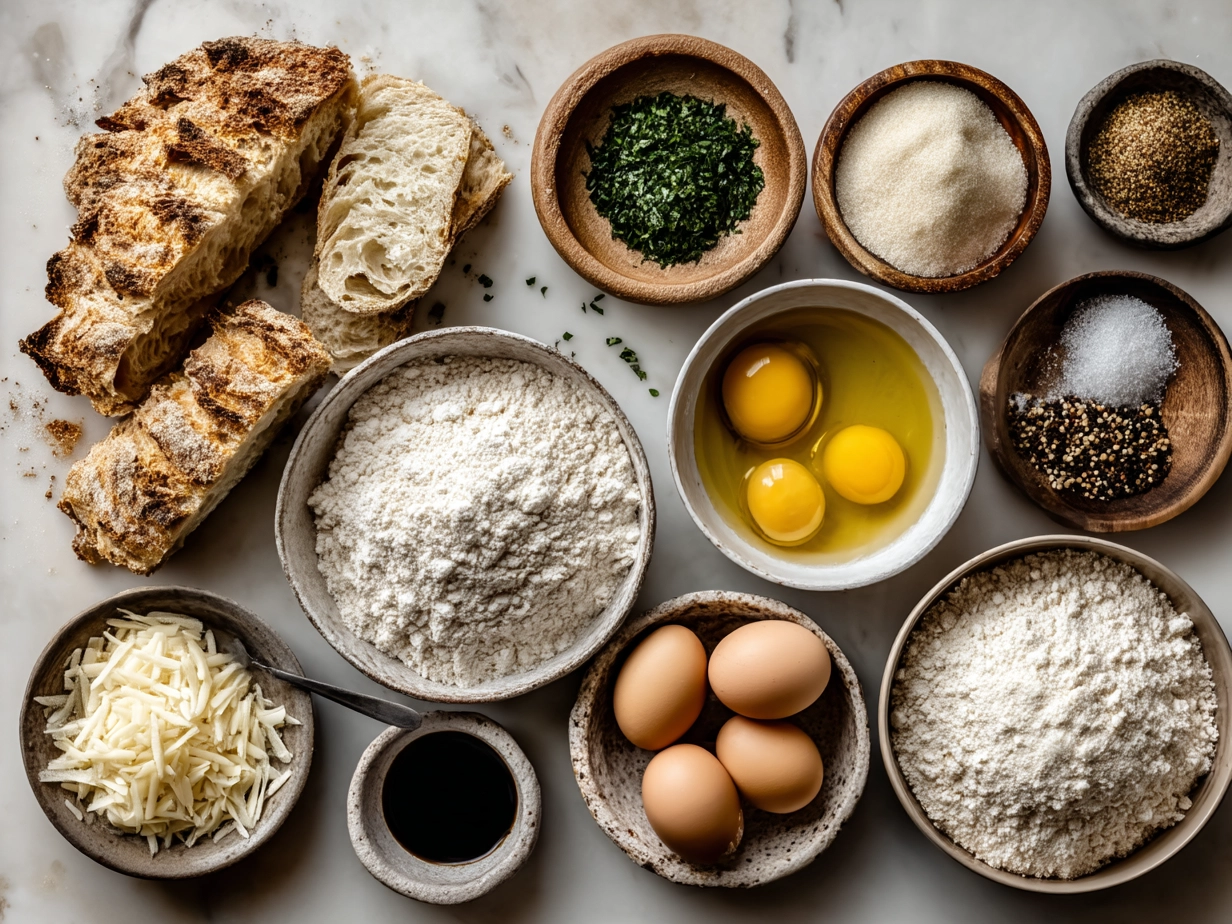
Making this Homemade Italian Bread is a breeze with just a handful of easy-to-find ingredients. Here’s what you’ll grab from the grocery store:
- 4 cups all-purpose flour (or bread flour if you want a little extra chew)
- 1 packet (2 1/4 tsp) active dry yeast
- 1 1/2 cups warm water (about 110°F—warm but not hot)
- 2 tbsp olive oil (I love the fruity kind for depth!)
- 2 tsp sugar (this feeds the yeast and adds a touch of sweetness)
- 2 tsp salt
Out of olive oil? No problem. You can swap in vegetable oil or even melted butter, and this Homemade Italian Bread still turns out beautifully.
I pick all these at my local grocery store—no fancy specialty shops needed. That’s part of what makes this Homemade Italian Bread so approachable. It’s friendly on the wallet too; no pricey ingredients here, just everyday pantry staples.
Quick prep tip: Warm your water just right to wake up the yeast but not kill it. A few seconds in the microwave or mixing warm tap water does the trick.
Leftovers? Wrap the bread tightly in foil or store it in a zipper bag at room temperature for 2-3 days. For longer keeping, slice and freeze—toast straight from frozen for fresh-baked vibes any day.
For my personal twist, I always add an extra tablespoon of olive oil to the dough. It helps develop that tender crumb and makes the artisan bread crust just a bit richer. You’ll notice the difference when you bite in!
Let’s Cook This Together:
1. Activate your yeast: In a big bowl, stir the sugar into the warm water until dissolved. Sprinkle the yeast on top and let it sit for 5-10 minutes until frothy. This is your sign the yeast is happily alive!
2. Mix the dough: Add olive oil, salt, and 2 cups of flour to the yeast mix. Stir until combined—it’ll be pretty sticky now, and that’s okay! Slowly add the rest of the flour, half a cup at a time, until the dough pulls away from the sides.
3. Knead, knead, knead: Turn your dough onto a floured surface. Give it about 8-10 minutes of kneading. It’s a bit of work, but this step builds the gluten that makes your Homemade Italian Bread lovely and chewy.
4. First rise: Place your dough ball into a lightly oiled bowl, cover with a towel or plastic wrap, and let it rise in a warm spot for about an hour or until it doubles in size. This step is magical—your kitchen is about to smell incredible! While that’s happening, grab a drink and relax. You deserve it.
5. Shape your loaf: Punch the dough down gently and shape it into a traditional Italian loaf—a long oval or a round boule, whatever you prefer. I like a long oval; it’s perfect for slicing.
6. Second rise: Lay your shaped dough on a baking sheet and cover again for 30 minutes. This gives the loaf room to puff up and develop flavor.
7. Preheat the oven and get crusty: Crank your oven up to 425°F. For that artisan bread crust, place a small oven-safe dish with water on the bottom rack while preheating. The steam keeps the crust blistered and crunchy.
8. Score and bake: Use a sharp knife to make a few diagonal slashes on the top of your dough. Pop it in the oven for 25-30 minutes. The loaf should be golden brown and sound hollow when tapped.
9. Cool and enjoy: Let your Homemade Italian Bread cool on a wire rack—if you can wait that long! I once tried cutting right away and ended up with squished slices. Patience is your friend here.
If your loaf isn’t as tall or crusty as you hoped, no worries. It might need a few extra minutes baking or a little less flour next time. Experimentation is part of the fun.
From start to finish, this Homemade Italian Bread comes together in about 2 ½ hours, most of which is patient waiting for the dough to rise. Going slow is part of what makes this bread so special.
How to Serve & Savor It:
This Homemade Italian Bread truly shines when you serve it fresh and warm with a drizzle of extra virgin olive oil and a sprinkle of flaky sea salt. It’s perfect alongside a big bowl of soup—tomato basil or minestrone are my top picks because they bring out that crusty bread goodness.
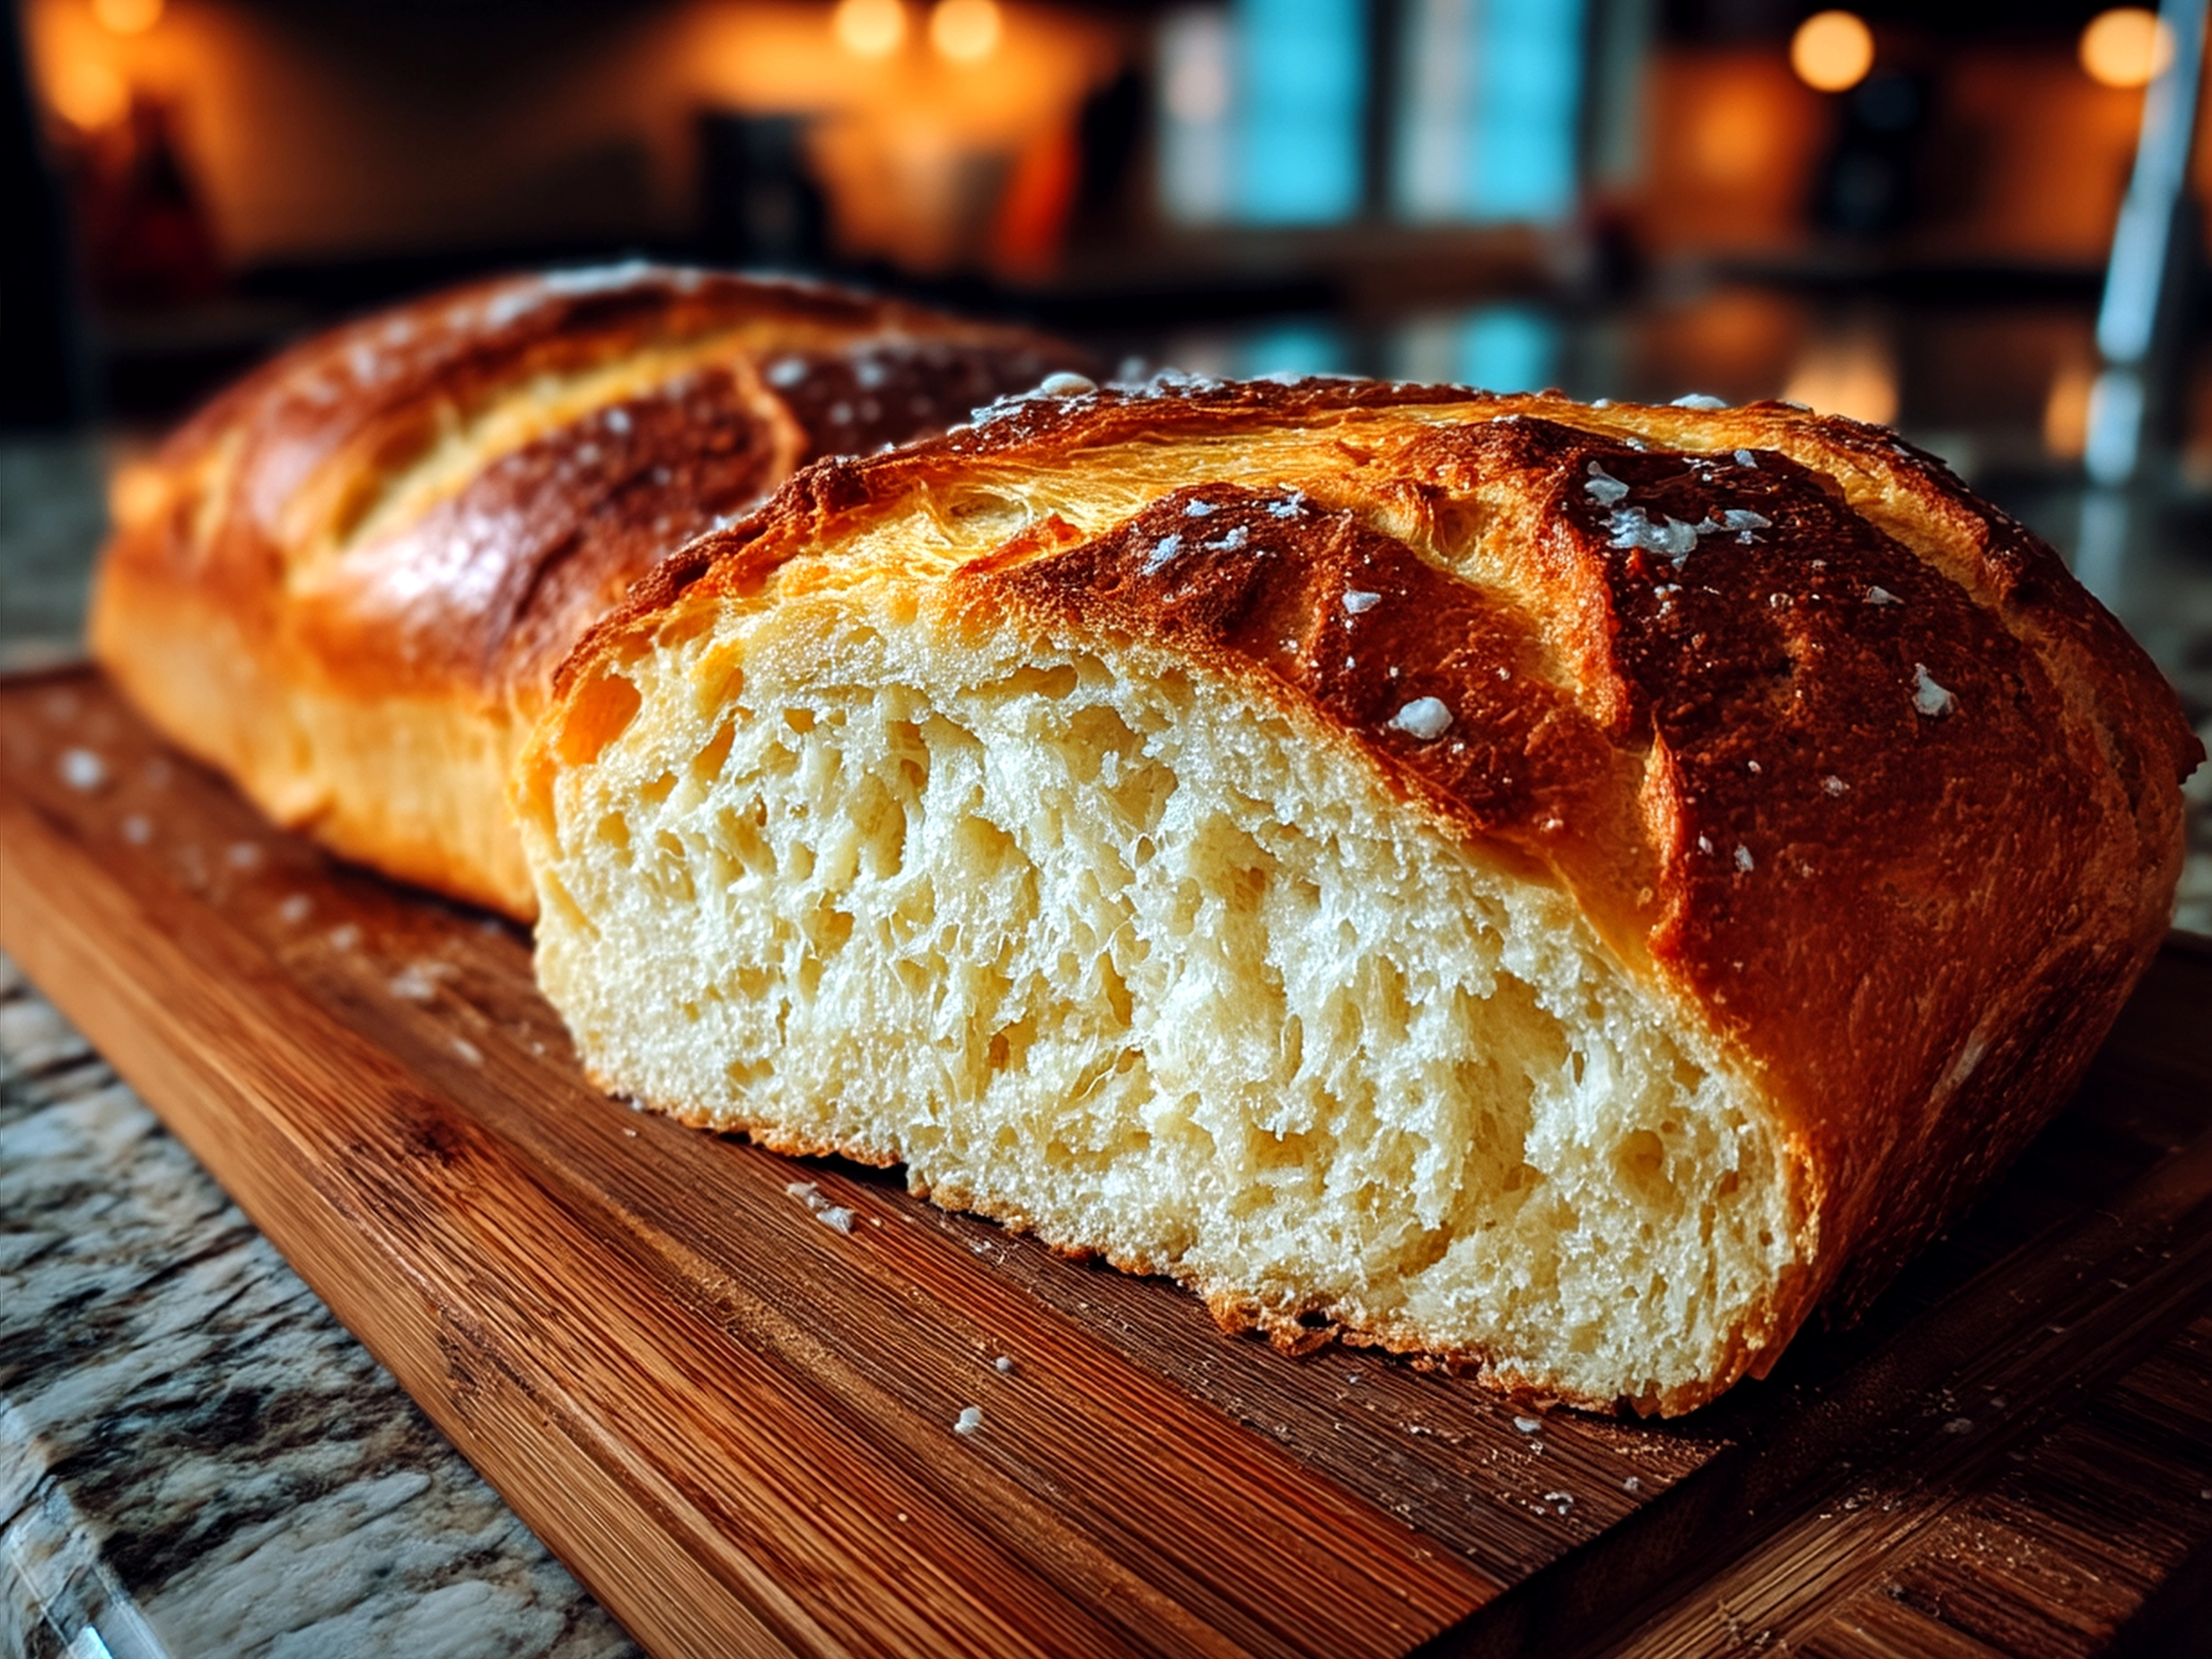
I also love slicing it thick and slathering with herbed butter for a simple yet delicious snack. The soft crumb inside contrasts so well with the crisp, artisan bread crust.
For gatherings, set out a spread with this Homemade Italian Bread, some olives, sliced cheeses, and cured meats. It’s a crowd-pleaser every time and gets talked about long after the meal.
If you have leftovers (and sometimes I do), turn slices into bruschetta topped with fresh tomatoes and basil or toast them for easy garlic bread with a sprinkle of Parmesan.
Seasonally, this bread feels right at home with autumn stews or summer salads, making it a year-round star.
This bread has been a total hit with my friends and family—they’re always asking for the recipe or when I’m making it again next.
Your Questions, Answered:
Can I prep parts of this Homemade Italian Bread ahead?
Absolutely! You can mix the dough the night before, cover it tightly, and let it rise slowly in the fridge overnight. Just bring it to room temp before shaping and baking.
What’s a good swap for all-purpose flour?
Bread flour gives extra chew but all-purpose flour works beautifully for this Homemade Italian Bread. If you’re gluten-free, you might experiment with blends (like King Arthur’s Gluten-Free Bread Flour) though texture will be different.
How can I make this Homemade Italian Bread for fewer people?
Simply halve the recipe! Because it’s forgiving, scaling down doesn’t change the outcome much. Just keep an eye on rising times which might be shorter.
What causes the bread to be dense sometimes?
Usually, dense bread means the dough didn’t rise enough or too much flour was added during kneading. Using a kitchen scale helps keep measurements precise.
Can I add herbs or cheese to the dough?
Yes! Mix fresh rosemary or garlic into the Italian bread dough for extra flavor. I’ve also tossed in shredded Parmesan—so good!
Do I need a baking stone?
Not at all. A regular baking sheet works fine. But if you want that super-crispy artisan bread crust, a preheated baking stone or steel is a nice touch.
Where can I find more recipes like this?
For more everyday foodie inspiration, check out the Italian Love Cake or watch this Rustic Italian Crusty Bread Recipe Video • Ciao Florentina to see a similar style in action.
Final Foodie Thoughts:
This Homemade Italian Bread holds a special place in my foodie heart because it’s about so much more than bread—it’s the satisfying process, the warm kitchen smells, and sharing something truly homemade. I love how even beginner bakers can make it shine with just a little patience and care.
My Top Homemade Italian Bread Tips:
– Use warm water to activate the yeast—tested and true!
– Don’t rush the rising steps; flavor and texture thank you.
– Add a splash of olive oil to the dough for a softer crumb.
I’ve loved trying variations—from garlic-herb to whole wheat mixes—but the classic version gets the loudest “make-again” requests by far.
This is your invite to make the recipe yours! Bake it for family dinners, weekend brunches, or when you need a simple solution that’s anything but bland. Happy baking, my friends—this Homemade Italian Bread is sure to become a favorite in your kitchen too!
If you want more inspiration, take a peek at Amanda’s Cookin’ Italian Bread Recipe or this lovely version from Baran Bakery.
Let’s get baking and make some magic happen in your kitchen!
Homemade Italian Bread
This Homemade Italian Bread features a crisp golden crust and a soft, airy interior, perfect for sandwiches or as a side to your favorite Italian dishes.
- Prep Time: 15 minutes
- Cook Time: 35 minutes
- Total Time: 1 hour 50 minutes
- Yield: 1 loaf (8 servings)
- Category: Dinner
- Method: Baked
- Cuisine: Italian
Ingredients
- 4 cups all-purpose flour
- 1 ½ cups warm water (110°F/45°C)
- 2 ¼ teaspoons active dry yeast (1 packet)
- 2 teaspoons sugar
- 2 teaspoons salt
- 2 tablespoons olive oil
Instructions
- In a small bowl, dissolve sugar in warm water; sprinkle yeast over the top and let it sit for 5-10 minutes until foamy.
- In a large mixing bowl, combine flour and salt.
- Add the yeast mixture and olive oil to the flour; stir until a dough forms.
- Turn the dough onto a floured surface and knead for about 8-10 minutes until smooth and elastic.
- Place the dough in a lightly oiled bowl, cover with a damp cloth, and let it rise in a warm place for about 1 hour, or until doubled in size.
- Punch down the dough and shape it into a loaf; place it on a greased baking sheet or in a loaf pan.
- Cover and let it rise again for 30 minutes until puffed.
- Preheat oven to 375°F (190°C).
- Optionally, score the top of the loaf with a sharp knife to create slashes.
- Bake for 30-35 minutes or until the bread is golden brown and sounds hollow when tapped.
- Remove from oven and cool on a wire rack before slicing.
Notes
For extra flavor, brush the top with garlic butter right after baking or sprinkle some herbs like rosemary before baking.